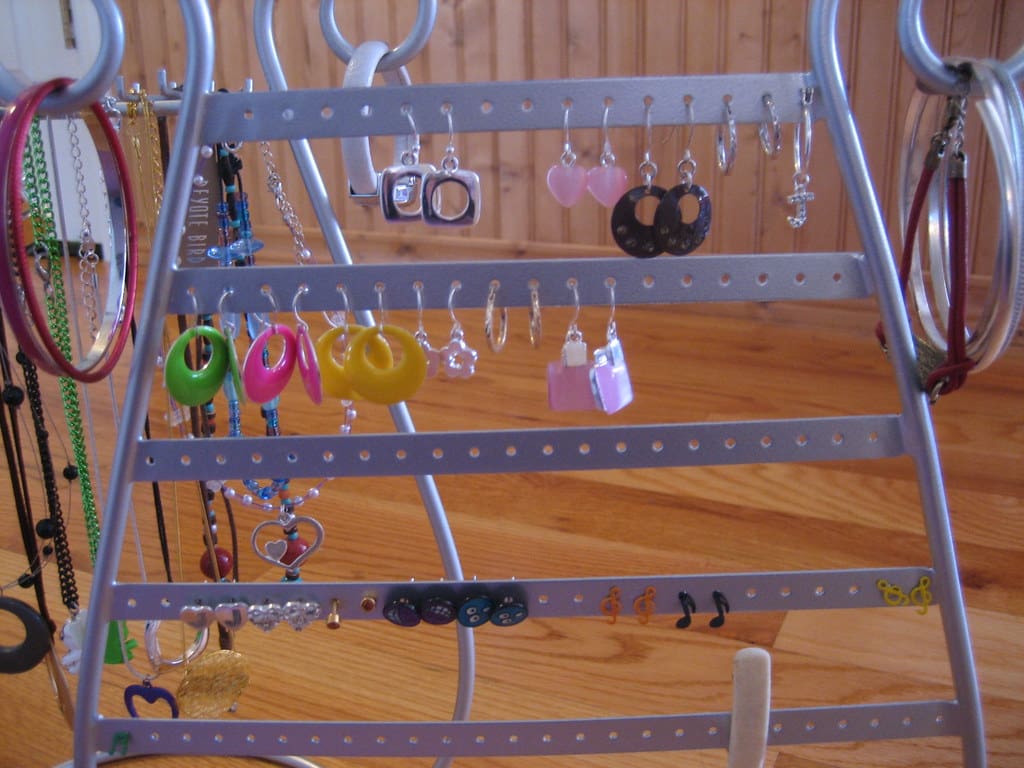
If you want an easy yet stylish way to organize your earrings, use this do-it-yourself earring organizer. All you need to create a beautiful, personalized earring stand to keep your jewels accessible and arranged is a few simple supplies and some time.
This blog article provides thorough instructions, ideas for personalizing your DIY Earring Holder, and other earring storage choices to assist you in keeping an eye-catching and neat jewelry collection.
Contents
Materials you’ll need
If you want to build an earring stand on your own, you only need a few inexpensive materials you can find at any hardware or hobby store in your area. Everything you’ll need is outlined below:
Any length and width of the wood you like must be at least 1/2 inch thick: A robust hardwood, such as oak or maple, will serve the purpose best. However, any wood would do. The wood will safely support your earrings’ weight if its thickness is at least 1/2 inch. You can adjust the wood’s size to accommodate the amount of earrings you want.
To fasten the boards to the wall, you will want wood screws or nails. The board thickness and the recommended nail or screw size match precisely.
Third, a Hammer or Drill? Said another way, the wood must be fastened to the wall using a hammer or drill. Utilizing screws requires a training program. A hammer will be necessary if you intend to use nails.
A saw is the fourth item in case any wood trimming is necessary. You may have to trim if the wood you select needs to be more significant. A saw will do this duty for you.
Fifth, use sandpaper to round off rough edges after cutting the wood to the correct size.
Step-by-step instructions
1. The wood must be trimmed to size after determining the desired length. The size of the wood should be proportional to the number of earrings you intend to keep. Use a wider wood plank to secure more than one pair of earrings. Too many pairs of earrings will be squeezed into that little wood piece.
2. Sand the wood until it is smooth. Painting or staining will be easier because the wood won’t splinter.
3. Make holes in the wood at the desired spots for the earrings’ hangers. If your earrings are on the smaller side, the holes will also be smaller. Check that the holes are the perfect size for your earrings—not too big, but not too little.
4. Choose a hue for the wood and apply paint or stain. This step is optional but might make your earring holder stand out.
5. Attach the earring stand to the wall using screws or nails. Check that the wall-mounted earring stand is firmly fastened to prevent it from falling.
Tips for personalizing your earring holder
- Here are a few suggestions for making your earring stand. Pick a color scheme or pattern that complements your decor or expresses your style. To give the wood a more rustic appearance, you might stain it with a natural wood finish or paint it a bright color to make it stand out. Add beads, glitter, or lace as accessories to your earring stand. It may be made much more distinctive and personalized by doing this.
- You can also hang your earring stand in a noticeable spot to add a more personal touch. This will enhance the aesthetic appeal of your space and make it simple for you to retrieve your earrings. Please switch it on your bathroom, closet, or bedroom wall.
- Alternatively, you may hang it from a pegboard or shelf. You can add the recipient’s name or initials to make your earring stand unique if you plan to give it as a gift. It might also be filled with their preferred earrings. They would enjoy this as a thoughtful and unusual gift.
How to care for your earring holder
Maintaining the finest possible organization and appearance of your jewelry requires taking good care of your jewelry stand. These pointers will help you keep the best possible condition for your jewelry stand:
1. **Clean your jewelry stand frequently** Over time, dust and debris can accumulate on your jewelry stand, making it unattractive and possibly damaging your jewelry. Wipe your jewelry stand with a dry, gentle cloth to clean it. Clean any lingering filth or grime patches with water and a light detergent. Before using your jewelry stand again, make sure it is scorched.
2. Keep the moisture out of your jewelry holder. Water can tarnish or rust your jewelry and cause your jewelry holder to bulge or deform. Store it somewhere cool to keep your jewelry holder dry and moisture-free. Consider using a humidifier to help keep the air dry if you live in a humid region.
3. Make sure you correctly store your jewelry holder. Put your jewelry holder somewhere safe and secure while not in use to prevent damage. Your jewelry holder can be stored on a shelf, in a closet, or a drawer. Cover your jewelry holder with a soft cloth to prevent scratches if you keep it in a drawer.
These pointers shield your jewelry from harm and keep your jewelry holder looking its best.
Additional earring storage ideas
Here are some more suggestions for storing earrings that you may try:
If you have many, you can keep your earrings in a repurposed egg carton. Remove the egg carton’s lid and store your earrings in separate sections. You can also keep your earrings in an upcycled shoe organizer. Use the pockets to hold your earrings as you hang the shoe organizer on the wall or in your wardrobe.
Using a magnetic strip to store earrings is an excellent alternative. Your earrings will hang from the magnets once you attach the magnetic stripe to a wall or inside your jewelry cabinet. You can also use a piece of chicken wire to store your earrings. Hook your earrings through the holes in the chicken wire, which you can hang from a wall or store in your wardrobe.
If you travel a lot, you can keep your earrings in a tiny zippered purse or travel jewelry case. Doing this lets you keep your earrings in order and guard against them becoming misplaced or broken. A small picture frame can also be used to keep your earrings organized. Take the glass out of the photo frame and use the structure to store your earrings.
Conclusion: Easy DIY Earring Holder: Organize Your Jewelry in Style
Let’s sum up this stylish approach to keep your jewels organized: this quick and simple DIY jewelry organizer. Basic materials and straightforward instructions will allow you to create a beautiful and functional jewelry organizer to keep your earrings organized and easily accessible. A unique and eye-catching addition to your home, your earring holder can also be customized to match your décor and style.
If you want to offer someone a thoughtful and original gift or are looking for a way to keep your earrings arranged, this handmade earring holder is a great substitute.
Kindly inform us via social media about your finished product. How you personalized your earring holder and how it helped you keep your jewels organized would interest us.


1 thought on “Easy DIY Earring Holder: Organize Your Jewelry in Style”